
Executing a flawless 7-course menu isn’t about cooking; it’s about mastering the systems of sensory orchestration.
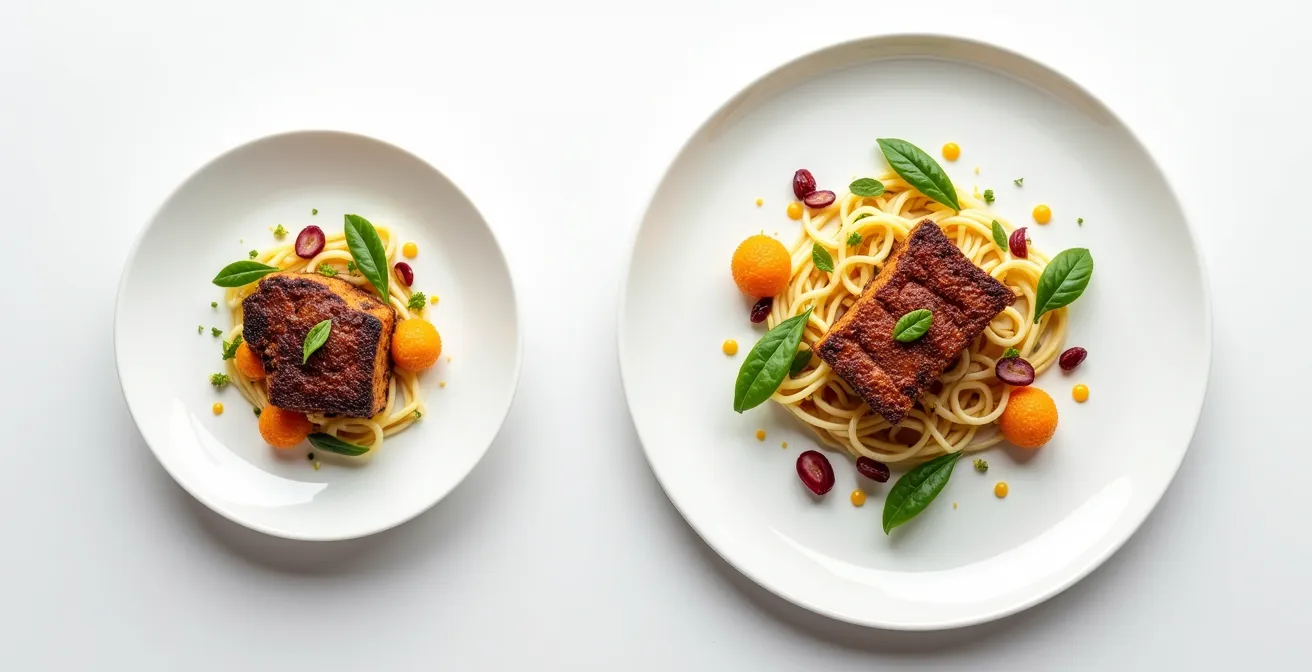
- Control portion size with a total cumulative target of 500g per guest to ensure they reach the final course with appetite.
- Manage flavor intensity in a bell curve, peaking at the main course to avoid the common pitfall of “salt fatigue.”
Recommendation: Adopt a ‘hybrid plating’ model, which transforms frantic, last-minute cooking into calm, methodical assembly, giving you time to enjoy your own dinner party.
The ambition of a confident home cook is a beautiful thing. You’ve mastered individual dishes, your sauces are balanced, your proteins are perfectly cooked. Now, the final frontier beckons: the multi-course tasting menu. It’s the pinnacle of home entertaining, a gesture of profound hospitality. Yet, it’s also where most talented cooks fail, not from a lack of skill, but from a flawed strategy. The common advice—”plan ahead,” “do your mise en place”—is true, but it’s table stakes. It won’t save you when you’re three courses in, sweating over a hot stove while your guests make polite conversation in the other room.
The challenge isn’t cooking seven great dishes. The challenge is orchestrating a single, cohesive, two-hour sensory journey. Chefs in professional kitchens don’t achieve this with magic; they use systems. These are frameworks for managing not just ingredients, but your guests’ very physiology and your own limited time and energy. The secret to a successful tasting menu at home lies in understanding three of these core systems: Satiety Pacing, the Flavor Arc, and Workflow Logistics.
This guide will not give you seven recipes. It will give you the operational blueprint a professional chef uses. We will move beyond the “what” of cooking and into the “how” of orchestration. You will learn to think not as a cook, but as a menu designer, a logistician, and a sensory architect. Forget hiring a staff; you are about to become the entire brigade, and you will do it with calm precision.
Summary: A Chef’s Guide to Designing a Home Tasting Menu
- Why Can You Eat Dessert Even When You Are Full After Steak?
- How to Calculate Grams Per Person So Guests Don’t Get Full by Course 4?
- Individually Plated vs Family Style: Which Is Easier for a Solo Home Chef?
- The “Salt Fatigue” Mistake That Makes Your Main Course Taste Bland
- How Many Minutes Should You Wait Between Courses to Aid Digestion?
- Ultra All-Inclusive vs Pay-Per-Service: Which Model Ensures Better Food Quality?
- Why Does Agar-Agar Texturize Sauces Differently Than Gelatin?
- How to Master the 5 Mother Sauces to Freedom from Recipe Dependency?
Why Can You Eat Dessert Even When You Are Full After Steak?
The ability to find “a second stomach” for dessert is not a matter of willpower; it’s a neurological phenomenon known as Sensory-Specific Satiety (SSS). Your brain gets tired of the same sensory inputs. After a rich, savory, hot steak, your brain’s satiety signals are specific to those flavor profiles. When you introduce something completely different—cold, sweet, and texturally distinct like a sorbet—your brain perceives it as a novel experience, temporarily resetting the feeling of fullness. In essence, your palate is bored, not your stomach full. Understanding this is the first key to menu design.
To leverage SSS, you must think in terms of contrast. Each course should be a deliberate departure from the last. It’s not just about flavor; it’s a multi-sensory reset. Consider temperature (hot to cold), texture (creamy to crunchy), and taste profile (savory to acidic). For example, following a creamy risotto with a crisp, acidic salad is a classic application of this principle. The salad doesn’t just taste good; it actively cleanses the palate and prepares the brain for the next experience. As recent neuroscience research reveals, this process activates specific regions in the prefrontal cortex, fundamentally resetting your guests’ perception of hunger.
A tasting menu that fails to provide this sensory variance will feel heavy and monotonous, leading to guests feeling “stuffed” by the third course. A menu that masterfully alternates sensory profiles feels light, engaging, and leaves guests marveling at how they could enjoy so much food. The dessert after the steak isn’t an indulgence; it’s the logical, neurological conclusion to a well-designed sensory arc.
How to Calculate Grams Per Person So Guests Don’t Get Full by Course 4?
The most common amateur mistake is portioning each of the seven courses as a small version of a regular dish. This inevitably leads to premature fullness. A professional tasting menu is not seven small meals; it is one meal delivered in seven parts. The total volume of food is the critical metric. A good rule of thumb is to aim for a cumulative total of 450-550 grams of food per person across all courses. Anything more, and you risk overwhelming your guests.
This requires a quantitative approach. You must weigh each component and think in terms of “compositional density”—the satiating power of an ingredient. A 100g portion of lean fish is far less filling than 100g of fatty pork belly or cheese. Therefore, the weight of your courses should follow a curve, starting small, peaking at the main protein, and tapering off. A successful 10-course menu, for instance, might start with a 30g vegetable course and build to a 120g beef main before descending. This structured approach is what separates professional orchestration from hopeful guesswork.
This table provides a reliable framework for distributing weight across a standard 7-course structure to stay within the ideal cumulative total. It introduces a ‘Density Score’ (1=Lightest, 5=Richest) to help you balance the menu not just by weight, but by satiating impact, a concept confirmed by studies on multi-course meal consumption.
| Course | Weight (grams) | Density Score | Cumulative Total |
|---|---|---|---|
| Amuse-bouche | 25-30g | 2 | 30g |
| Appetizer/Soup | 80-90g | 2-3 | 120g |
| Fish Course | 70-80g | 4 | 200g |
| Main Protein | 100-120g | 5 | 320g |
| Palate Cleanser | 30-40g | 1 | 360g |
| Cheese Course | 40-50g | 4 | 410g |
| Dessert | 80-90g | 3 | 500g |
Beyond weight, presentation plays a psychological role. Using larger plates creates negative space, making a small portion appear deliberate and artistic rather than stingy. Plating with vertical height also gives a small amount of food more presence. This is the art of “visual volume,” a crucial tool for making a precisely calculated 80g portion feel generous and satisfying.
Individually Plated vs Family Style: Which Is Easier for a Solo Home Chef?
The dream of presenting seven beautifully, individually plated courses often clashes with the reality of a single person in a home kitchen. The answer is not to choose one style over the other, but to adopt a “hybrid plating” model. This professional strategy blends the efficiency of family-style service with the elegance of individual plating, allowing the solo chef to remain calm and in control.
The core of this system is to differentiate between components that can be pre-plated and those that require last-minute heat. Sauces, purées, and cold garnishes can be artfully arranged on individual plates up to 30 minutes before serving and covered. The hot protein or main element is then the only component that needs to be cooked and added just before the plate goes out. This transforms the final, frantic moments of cooking into a calm, 90-second assembly line. A “finishing station” with all components prepped in squeeze bottles and small containers is essential to this workflow.
Case Study: The 10-Course Home Menu Execution
A professional chef executing a 10-course menu at home used this hybrid approach to perfection. Cold courses like radish and zucchini were fully pre-plated. Hot mains, with proteins cooked via sous vide and held at the perfect temperature, were assembled in under 90 seconds per plate using a meticulously organized finishing station. For communal-feeling courses, a bread service and a cheese board were served family-style. The critical factor was organizing every single component by course in labeled containers. This shifted the chef’s role from “cook” to “assembler,” and as a result, the kitchen was nearly clean by the time dessert was served.
Certain courses lend themselves naturally to one style. Soups are easily served individually from a tureen. A cheese course is often best presented family-style on a board, inviting conversation. The main protein might be carved at the table from a platter (family-style) onto individual plates that have already been pre-set with their accompaniments (individual plating). This dynamic approach reduces your workload and adds a theatrical, interactive element to the meal.
The “Salt Fatigue” Mistake That Makes Your Main Course Taste Bland
Have you ever had a tasting menu where everything started to taste the same by the fifth course? This is often due to a flat flavor trajectory, specifically “salt fatigue.” If you season every savory course to what feels like a perfect level individually, the cumulative effect is an overwhelming barrage of sodium that dulls the palate. Your main course, which should be the climax, ends up tasting bland because your guests’ taste buds are already saturated.
The solution is to design a “flavor arc.” Flavor intensity, especially salt, should not be a straight line; it should be a bell curve. The first few courses should be seasoned lightly, emphasizing the natural flavors of the ingredients with a salt content around 2-3%. As you approach the main course, you build intensity, introducing umami and richer elements, peaking at 4-5% salt for the main event. After the climax, the flavor intensity must descend. The cheese course and dessert transition to a different profile, relying on fat, sweetness, and bitterness rather than salt.
This arc must also include “acid breaks.” A squeeze of lemon, a pickled element, or a citrus-based palate cleanser between richer courses acts as a reset button for the palate. It cuts through the lingering salt and fat, preventing fatigue and preparing the taste buds for the next wave of flavor. Seasoning isn’t just about adding salt; it’s about managing the entire sensory experience over time, often using textural elements like crispy shallots or toasted nuts to enhance flavor perception without adding more salt.
Action Plan: Auditing Your Menu’s Flavor Arc
- Component Inventory: List every component across all seven courses that delivers salt, acid, or fat (e.g., sauce, cured meat, vinaigrette, protein).
- Intensity Scoring: On a scale of 1-5, assign a perceived salt/richness score to each course as a whole.
- Arc Visualization: Plot these scores from course 1 to 7. Does it form a bell curve that peaks at your main course? Or is it a flat, fatiguing line?
- Peak Identification: Confirm that your main course represents the clear “flavor climax” of the meal. If not, identify where flavor is peaking too early.
- Refinement Plan: Identify gaps where an “acid break” is needed (e.g., between two rich courses). Plan to either reduce salt in early courses or add a citrus element to reset the palate.
How Many Minutes Should You Wait Between Courses to Aid Digestion?
Pacing is the invisible element that dictates the rhythm and flow of the evening. Too fast, and guests feel rushed; too slow, and the energy dissipates, leaving them feeling lethargic and overly full. The ideal timing is not a fixed number but a dynamic strategy based on the complexity and density of the courses being served.
As a general framework, the “flip time” between lighter early courses (e.g., amuse-bouche to soup) should be brief, around 5-7 minutes. This is just enough time to clear plates, pour the next wine, and bring out the following course. The most crucial intervals are before and after the main course. A longer pause of 10-15 minutes is essential here. This allows time for a protein to rest properly after cooking, for a pan sauce to be finished, and, most importantly, for guests’ digestive systems to begin processing the richest part of the meal.
A true professional move is to script and announce these pauses. Instead of a silent, awkward wait, you can frame it as a deliberate part of the experience: “We’ll take a ten-minute pause now to let those wonderful flavors settle before the main event.” This manages expectations and elevates the pause from a logistical necessity to a luxurious moment of anticipation. An extended 15-20 minute “digestif break” before dessert is another key strategy. It provides a clear mental and physical separation from the savory part of the meal and gives you a crucial window for final dessert preparations, like torching a crème brûlée, without being rushed.
Case Study: Alternating Complexity for Natural Pacing
An experienced host successfully managed a 2.5-hour, 10-course dinner by building the menu with alternating complexity. A high-effort, last-minute seared fish course was followed by a zero-effort, pre-plated granita. This structure created natural, built-in breaks in the kitchen workflow. The time needed to plate the complex dish became the wait time for the previous course, while the instant service of the simple course created a buffer to begin prepping the next complex one. This strategic alternation of high- and low-effort courses is the key to maintaining a steady pace without burning out.
Ultra All-Inclusive vs Pay-Per-Service: Which Model Ensures Better Food Quality?
When approaching a seven-course menu, the home chef often defaults to an “ultra all-inclusive” model: everything must be made from scratch. This is a recipe for exhaustion and, paradoxically, can lead to lower quality as your energy wanes. A professional thinks like a business and adopts a “pay-per-service” or strategic outsourcing model. The goal is to allocate your most valuable resource—your time and energy—to the components that deliver the highest impact and define your personal style.
You must perform a ruthless “make vs. buy” analysis. Identify your 2-3 “showcase” elements. Is it your signature sauce? The perfectly cooked main protein? A complex dessert technique? These are non-negotiable; they must be made by you. Everything else is a candidate for outsourcing, provided you can source a replacement of at least 95% of the quality you could produce yourself. You are not “cheating”; you are making an executive decision to conserve your energy for where it matters most.
This table illustrates a professional decision matrix. The goal is to trade hours of labor for a minimal, often imperceptible, drop in quality on non-critical components, freeing you to perfect your showcase items. For instance, spending 8 hours on a stock that a premium store-bought version can replicate to 85% quality is a poor use of time. Buying from an artisan bakery or gelateria often results in a product superior to what you could make under pressure.
| Component | Make From Scratch | Smart Outsource | Time Saved | Quality Impact |
|---|---|---|---|---|
| Bread/Crackers | 4 hours prep | Artisan bakery | 3.5 hours | 95% quality |
| Stock/Broth | 8 hours simmer | Premium store brand | 7 hours | 85% quality |
| Pâté/Terrine | 2 days process | Specialty deli | 48 hours | 95% quality |
| Ice Cream/Sorbet | 6 hours + freezing | Artisan gelateria | 5 hours | 98% quality |
| Main Protein | Make always | Never | 0 hours | 100% showcase |
| Signature Sauce | Make always | Never | 0 hours | 100% showcase |
The total active cooking time on the day of your event should not exceed six hours. If your plan requires more, your “all-inclusive” model is destined to fail. By strategically outsourcing time-consuming, high-risk items like puff pastry or complex terrines, you buy back the focus needed to execute your signature dishes flawlessly. This is the smartest compromise you can make.
Why Does Agar-Agar Texturize Sauces Differently Than Gelatin?
For a solo chef, make-ahead components are a lifeline. This is where understanding the technical differences between gelling agents like gelatin and agar-agar becomes a strategic advantage. While both create gels, their properties are fundamentally different, and choosing the right one can revolutionize your workflow. Gelatin is an animal protein that creates a creamy, melt-in-the-mouth texture, but it is thermally fragile, melting near body temperature and needing refrigeration to set.
Agar-agar, a seaweed derivative, is a game-changer for the home chef. Its primary advantage is its thermal stability. An agar gel sets at room temperature (around 32-35°C) and, crucially, does not melt until it reaches 85°C (185°F). This allows you to create components that are solid and stable on a cool plate but will transform into a fluid sauce when a hot protein is placed on top. Agar also creates a firmer, more brittle gel with superior clarity, perfect for elegant consommé pearls or clear gels that hold their shape. According to a comparison of their properties, agar gels are also stable for 3-4 days, whereas gelatin can weep or degrade after 24 hours.
| Property | Gelatin | Agar-Agar | Best Use Case |
|---|---|---|---|
| Setting Temp | Below 15°C/59°F | Room temp 32-35°C | Agar: pre-plate components |
| Melting Point | 27°C/80°F | 85°C/185°F | Agar: hot holding stability |
| Texture | Creamy, elastic | Firm, brittle snap | Gelatin: panna cotta; Agar: clear gels |
| Concentration | 1-3% | 0.5-1.5% | Agar: more economical |
| Clarity | Slightly cloudy | Crystal clear | Agar: consommé pearls |
| Make-Ahead | 24 hours max | 3-4 days stable | Agar: advance prep advantage |
The most powerful application of this is the “holdable hot gel” technique. By adding a small amount of agar (around 1%) to a finished sauce, you can pour it into molds and let it set into solid, portion-sized cubes. These can be made days in advance. During service, you simply place a cold, solid sauce cube on the plate during your calm assembly phase. When you place the hot fish or steak on top, the gel melts instantly into a perfect, glossy, fluid sauce. This eliminates the chaos of holding multiple sauces hot and trying to portion them with a ladle at the last second.
Key Takeaways
- Satiety Management: Success is not about cooking seven recipes, but engineering a single sensory journey with a cumulative weight of ~500g and constant sensory contrast.
- Workflow Logistics: Adopt a hybrid plating model with a “finishing station” and strategically outsource components to transform frantic cooking into calm assembly.
- The Flavor Arc: Manage flavor intensity in a bell curve, peaking at the main course and using “acid breaks” to prevent palate fatigue.
How to Master the 5 Mother Sauces to Freedom from Recipe Dependency?
The classical five mother sauces of French cuisine (Béchamel, Velouté, Espagnole, Hollandaise, Tomate) are a foundation, but for a modern tasting menu, they can be restrictive. To achieve true freedom from recipe dependency, you must master not specific sauces, but modern sauce systems. This component-based approach allows for infinite variation with minimal mental overhead.
Instead of five sauces, think in five frameworks: the Savory Purée Base (master one technique, vary the vegetable), the Infused Oil System (create potent flavor bases for dressing or finishing), the Fortified Broth Framework (intense, clean ‘eaux’ from reductions), the Complex Vinaigrette Matrix (master the emulsion, vary the oils and acids), and the Fruit Gastrique Foundation (a sweet-sour syrup for savory and sweet courses). By mastering these five techniques, you can generate hundreds of unique sauces simply by swapping out the primary flavor component.
Case Study: One Base, Three Sauces
A home chef demonstrated this efficiency by building a menu around a single Velouté base (roux plus chicken stock). For the second course, this base was transformed into a mushroom cream sauce with the addition of sautéed mushrooms and cream. For the fish course, it became a saffron sauce by infusing saffron and adding white wine. Finally, for the main protein, it was finished as a tarragon reduction by incorporating a reduction of wine, shallots, and fresh tarragon. This approach dramatically reduced complexity and prep time, allowing creativity to flow from simple additions rather than starting from scratch for each course.
This “one base, many derivatives” methodology is the secret to efficiency in professional kitchens. It minimizes prep and cleanup while maximizing variety. Once you understand that a sauce is simply a combination of Fat + Liquid + Thickener + Flavor + Acid, you are no longer a recipe follower. You are a sauce architect, free to create and adapt on the fly, responding to the ingredients you have and the flavor profile you need to build your menu’s arc.
Your journey from confident cook to home-based maestro begins now. These are not just tips; they are the operating systems of a professional kitchen, adapted for yours. Choose your first system to master—whether it is quantifying your portions, designing a flavor arc, or building a finishing station—and begin designing your menu not as a list of dishes, but as a complete, orchestrated experience.