Molecular gastronomy isn’t about buying a lab’s worth of equipment; it’s a creative philosophy for transforming everyday ingredients.
- Mastering texture relies on understanding common agents like agar vs. gelatin, not complex chemicals.
- Elegant plating and zero-waste techniques can elevate simple dishes to fine-dining status using basic tools.
Recommendation: Start by focusing on one principle, like textural contrast or seasonal menu design, to bring a modernist touch to your next meal.
The term “molecular gastronomy” often conjures images of chefs in lab coats, wielding liquid nitrogen and complex siphons to create ethereal foams and gravity-defying spheres. For the adventurous home cook, this world can seem both fascinating and utterly inaccessible, a culinary frontier guarded by expensive equipment and obscure ingredients. This perception has led many to believe that modernist cuisine is a spectator sport, best enjoyed in a Michelin-starred restaurant rather than attempted in one’s own kitchen. The common advice often reinforces this: get a sous-vide circulator, order a starter kit of hydrocolloids, and prepare for complex, scientific procedures.
But what if this entire premise is flawed? What if the true essence of molecular gastronomy isn’t in the gear, but in the mindset? The real secret of the avant-garde chef lies not in their tools, but in their deep understanding of how ingredients behave. It’s a philosophy of curiosity that asks “why” and “what if.” Why does a sauce thicken? What if I could capture the flavor of a roast chicken in a transparent gel? This approach is about manipulating texture, temperature, and perception to create new and delightful experiences.
This guide demystifies the practice by shifting the focus from expensive gadgets to accessible principles. We will explore how to deconstruct flavors, transform textures, and plate with artistic intention using techniques and tools you likely already possess. You will learn to think like a modernist chef, unlocking a new level of creativity that can turn a simple weeknight meal into a conversation-starting masterpiece. This is your entry into a world where a fork, a freezer, and a deep understanding of your ingredients are the most powerful tools in your arsenal.
To navigate this creative culinary journey, we will deconstruct the core principles of modernist cooking into accessible, practical steps. This article is structured to build your skills progressively, from understanding basic textures to orchestrating a full tasting menu.
Summary: Molecular Gastronomy at Home: Master Modernist Cooking Without the Pro Gear
- Why Does Agar-Agar Texturize Sauces Differently Than Gelatin?
- How to Plate a Simple Dish to Look Like It Came from a Michelin Kitchen?
- Sous-Vide vs Braising: Which Method Yields the Most Tender Short Ribs?
- The Fine Dining Mistake: How to Avoid Wasting 30% of Ingredients for “The Look”?
- How to Build a Modern Menu Based Strictly on What Is in Season This Month?
- Voice Control vs App Control: Which Is More Practical for Kitchen Appliances?
- Why Do Soy Sauce and Butter Work Together According to Molecular Pairing?
- How to Design a 7-Course Tasting Menu at Home Without Hiring a Staff?
Why Does Agar-Agar Texturize Sauces Differently Than Gelatin?
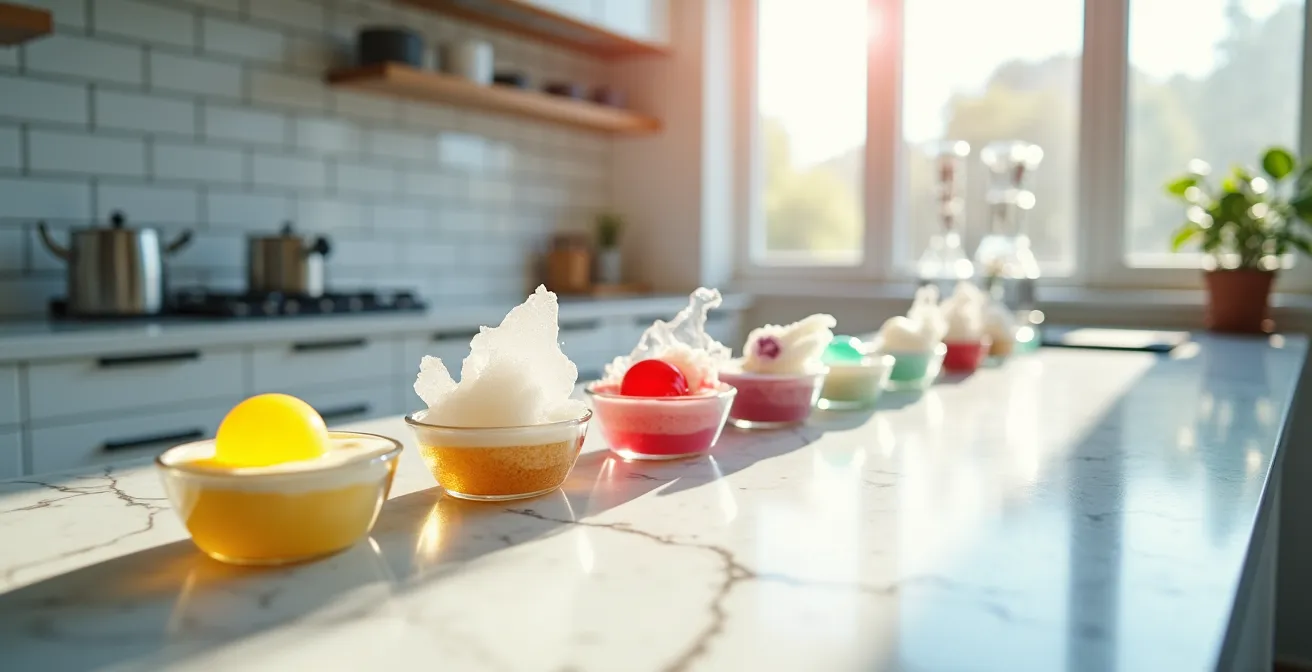
Understanding texture is the first step into the world of modernist cooking, and it begins with two common pantry items: gelatin and agar-agar. While both create gels, thinking of them as interchangeable is like treating a cello and a violin as the same instrument. Their differences are their superpowers. Gelatin, an animal-derived protein, creates soft, elastic, melt-in-your-mouth textures. It dissolves in warm liquid and sets when chilled, but it will melt again at body temperature, giving panna cotta its signature lusciousness. Its weakness is its thermal fragility; you can’t serve a hot gelatin-based gel.
Enter agar-agar, a seaweed derivative. This is the key to many modernist “tricks.” Agar requires boiling to activate but, crucially, it sets at room temperature and remains solid up to 185°F (85°C). This property is what allowed Chef Ferran Adrià at El Bulli to create revolutionary dishes like hot jellies and savory “spaghetti” from vegetable juice. The texture is also entirely different: agar creates a firm, brittle gel that snaps cleanly, offering a textural contrast gelatin can’t achieve. This allows you to create firm gels that hold their shape, cubes of flavor that don’t melt on a warm plate, and even clarify broths through a freeze-thaw technique.
By understanding this fundamental difference, you’re no longer just following a recipe; you are making a conscious textural choice. Do you want a silky, yielding mouthfeel, or a clean, firm bite? This decision, not a fancy machine, is your first act of culinary modernism. It’s about wielding the inherent properties of ingredients to design an experience from the ground up.
Your Action Plan: Master Agar vs. Gelatin Textures
- Dissolve agar powder in boiling liquid (1 teaspoon per cup) and simmer for 2-3 minutes to activate.
- For gelatin, bloom it in cold water first (5 minutes), then dissolve it in warm liquid at a maximum of 140°F (60°C).
- Set agar at room temperature (it gels around 88°F/31°C), making it ideal for stable hot preparations.
- Use agar for brittle, clean-breaking textures and gelatin for elastic, melt-in-your-mouth textures.
- To clarify broths, freeze an agar or gelatin mixture overnight, then thaw it slowly through cheesecloth to trap impurities, leaving a crystal-clear consommé.
Mastering these two ingredients gives you a foundational toolkit for textural transformation, allowing you to craft everything from delicate jellies to robust, sliceable savory elements.
How to Plate a Simple Dish to Look Like It Came from a Michelin Kitchen?
Once you control texture, the next frontier is perception. Fine dining is as much a visual art as a culinary one, and plating is the craft of turning food into a statement. You don’t need expensive custom-made plates; you need to understand the principles of composition, color, and flow. The plate is your canvas. Instead of piling food in the center, think like a painter or a landscape artist. The most common mistake is symmetry, which often looks dated and static. Modern plating embraces asymmetry and negative space.
To start, consider the “Rule of Thirds” from photography: imagine your plate divided by two horizontal and two vertical lines. Placing your main element at one of the intersections creates immediate visual interest. From there, you can build using different methods. The “Landscape” method is particularly effective, arranging elements in a flowing, organic line across the plate, mimicking a natural scene. This is where simple tools come in. A spoon can be used to create an elegant “swoosh” of purée. A simple fork can be dragged through a sauce to create texture and direction. Even crumpled parchment paper can be dabbed in a sauce to create an artistic splatter effect.
This approach transforms ingredients into compositional elements. A vibrant green herb oil isn’t just a flavor; it’s a splash of color. Microgreens aren’t just a garnish; they are a textural high point. By thinking in terms of lines, dots, and carefully placed components, you create a visual narrative that guides the diner’s eye and builds anticipation before the first bite.
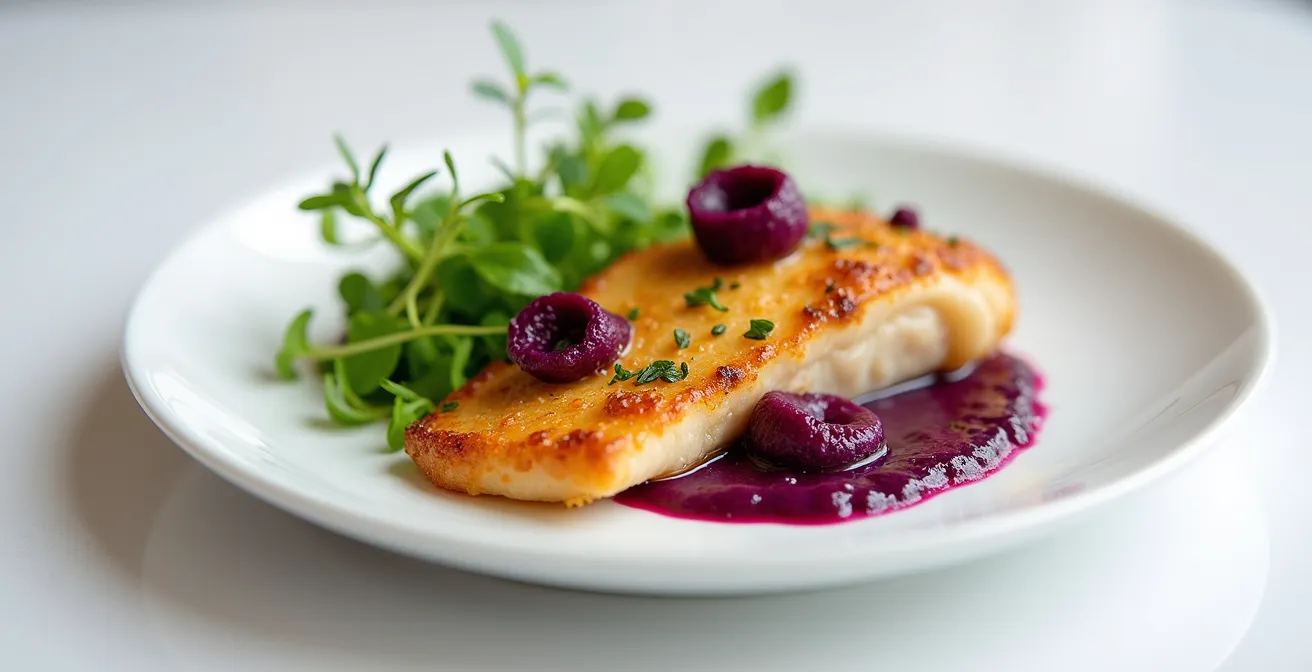
As this visual demonstrates, the organic arrangement of elements in a landscape style creates a dynamic and modern presentation. This is a core concept that elevates home cooking into culinary art, a principle highlighted by experts from the world’s top kitchens. For a deeper dive into these professional techniques, a guide to exquisite plating from Michelin-starred chefs provides invaluable visual inspiration.
| Plating Method | Characteristics | Best For | Example Layout |
|---|---|---|---|
| Clock Method | Structured, geometric placement | Traditional fine dining | Protein at 6, starch at 10, vegetables at 2 |
| Landscape Method | Organic, flowing presentation | Modern artistic plates | Asymmetrical arrangement mimicking nature |
| Rule of Thirds | Balanced visual weight | Photography-inspired plating | Main element at intersection points |
The goal is to create a plate that looks intentional and artistic, proving that the most powerful tool for beautiful plating is a creative eye, not a specific gadget.
Sous-Vide vs Braising: Which Method Yields the Most Tender Short Ribs?
The debate between modern and traditional techniques often centers on tools like the sous-vide circulator. While it’s a hallmark of modernist kitchens, its true value lies in the principle it embodies: precise temperature control. Comparing how sous-vide and traditional braising tenderize a tough cut like short ribs reveals this principle in action. Braising relies on high, moist heat (typically 325°F/160°C or higher) to aggressively break down tough collagen into gelatin. It’s effective but imprecise; a little too long and the meat turns mushy and dry as it expels its moisture.
Sous-vide flips the script. By cooking the short ribs in a sealed bag in a water bath at a much lower, perfectly stable temperature—say, 140°F (60°C) for 48 hours—you approach collagen breakdown differently. It’s a slow, gentle transformation. The science of temperature control reveals a key advantage: at these lower temperatures, you achieve a 50% slower collagen breakdown at 150°F, which helps retain up to 30% more moisture than traditional braising. The result isn’t just tender; it’s a unique texture that’s impossibly succulent and juicy, with the meat still holding its shape. A 48-hour sous-vide short rib has the fall-off-the-bone quality of braising but with the internal texture of a perfectly cooked steak.
While a sous-vide machine is the easiest way to achieve this, the principle can be mimicked at home. Using a simple digital thermometer, a pot of water on the stove, or even a well-insulated cooler (the “cooler-hack” sous-vide), you can experiment with low-temperature cooking. The takeaway isn’t that you must buy a circulator, but that understanding the relationship between temperature, time, and texture unlocks results that traditional methods can’t replicate. It’s about using precision to achieve a superior outcome.
Ultimately, sous-vide is not just a technique but a philosophy of control, allowing for consistency and textures that were previously unattainable in any kitchen, professional or otherwise.
The Fine Dining Mistake: How to Avoid Wasting 30% of Ingredients for “The Look”?
A common critique of fine dining is its perceived wastefulness—trimming vegetables into perfect tournés and using only the pristine heart of an ingredient for that perfect plate. However, the modernist ethos, when practiced thoughtfully, is actually the opposite: it’s about radical resourcefulness. The philosophy is to extract 100% of the potential from every single ingredient. That 30% of “waste” isn’t trash; it’s a source of untapped flavor and texture waiting to be transformed.
This “trim-to-treasure” approach is central to the creative process. Those carrot peels you cut away? Dehydrate them at a low oven temperature (around 200°F/95°C) for a couple of hours until brittle, then blitz them into a vibrant, flavorful powder to dust a plate. The tough stems from a bunch of parsley? Gently infuse them into oil over low heat to create a potent, emerald-green herb oil. Even onion and leek ends can be charred until black, then pulverized into a smoky, savory ash that adds incredible depth as a seasoning.
This mindset extends beyond simple trim. Juicing vegetable offcuts and thickening the liquid with a tiny pinch of xanthan gum (a common thickener available online or in specialty stores) can create intensely flavored sauce dots. Meat and fish trimmings can be pressure-cooked to produce a deeply concentrated jus or broth in a fraction of the time of traditional stock-making. This isn’t just about being frugal; it’s about flavor concentration and creating new components from a single source, adding layers of complexity to a dish. It’s a creative challenge: how many distinct, delicious elements can you create from one humble carrot?
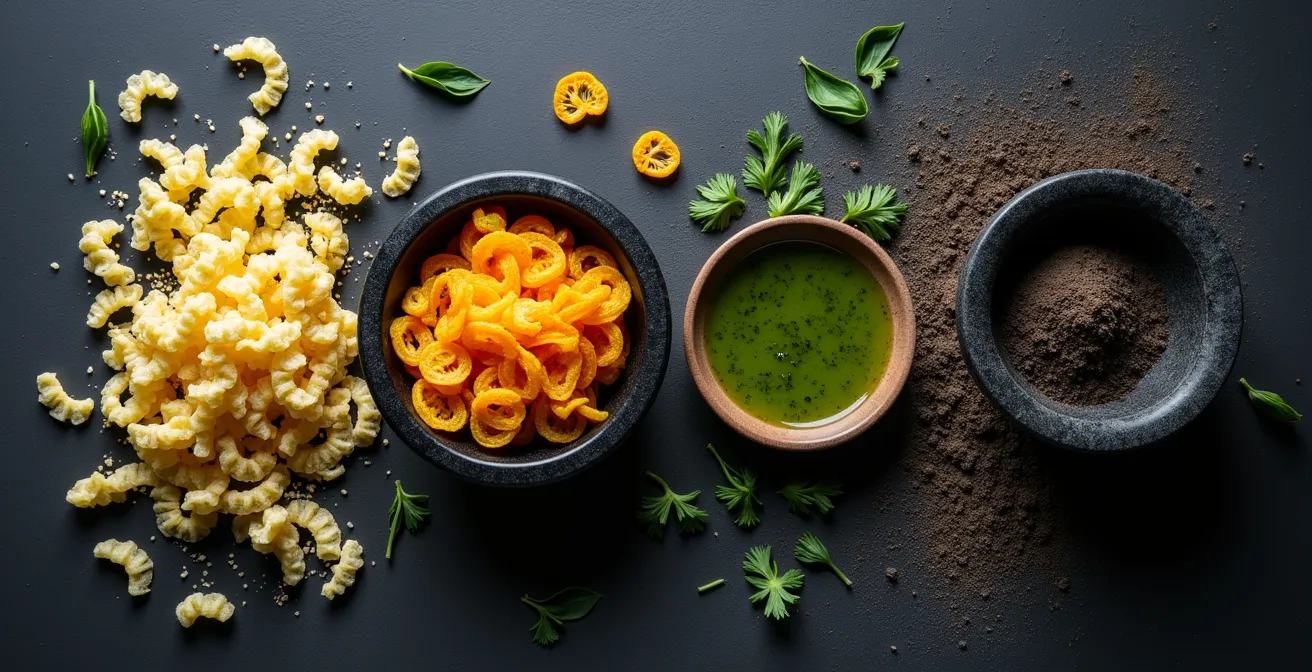
The transformation from raw scraps to refined culinary elements is a cornerstone of this philosophy. It’s about seeing potential where others see waste and using simple techniques like dehydration and infusion to unlock it.
By adopting this zero-waste approach, you’re not only cooking more sustainably, but you’re also adding unique, deeply flavorful, and texturally interesting components to your culinary palette.
How to Build a Modern Menu Based Strictly on What Is in Season This Month?
A truly modern menu is not defined by exotic ingredients flown in from across the globe, but by a deep and creative engagement with what is perfectly in season right outside your door. Seasonality is the ultimate creative constraint. A modernist chef sees a crate of peak-season asparagus not as one ingredient, but as a spectrum of possibilities. This is where the “single ingredient, three ways” framework becomes a powerful tool for menu design.
Take that asparagus, for example. Instead of just steaming it, you deconstruct it. The tender tips can be quickly blanched or grilled to highlight their delicate flavor and slight char. The tougher stalks can be shaved raw into thin ribbons for a crisp, fresh salad element, providing a textural counterpoint. Finally, the remaining stalk pieces can be puréed into a vibrant, silky sauce or soup base. In one stroke, you’ve created three distinct components—charred, raw, and puréed—that showcase the full range of a single vegetable. This technique provides textural and flavor variety while demonstrating an intelligent use of the entire product.
Building from this, a seasonal menu becomes a “flavor arc.” You start a meal with light, high-acidity preparations—like a foam made from pickled seasonal fruit—to awaken the palate. You then progress to richer, umami-laden middle courses, perhaps using fermented vegetables from the same harvest. The main course might feature a sous-vide protein paired with a concentrated sauce from roasted seasonal vegetable trim. The key is to think about the dining experience as a journey, with each course building on the last, all while being anchored in the singular beauty of what is at its absolute best, right now.
This approach moves beyond simply cooking what’s in season to creating a cohesive, multi-layered narrative that celebrates the ingredient in its entirety.
Voice Control vs App Control: Which Is More Practical for Kitchen Appliances?
The modern kitchen is increasingly a connected one, and with smart ovens, thermometers, and scales, a new question arises for the home cook: is it more practical to command your kitchen with your voice or with an app? The answer isn’t about which is “better,” but which is better for the specific task at hand. This is another modernist principle in disguise: choosing the right interface for the desired level of precision and workflow.
Voice control shines in moments of high action and messy hands. Shouting “Hey Google, set a timer for 5 minutes!” while you’re kneading dough is undeniably more practical than washing your hands to tap a screen. It excels at simple, immediate commands for which perfect precision isn’t the top priority, like preheating an oven to a round number (“Preheat to 400 degrees”). However, its weakness is a higher cognitive load; you have to remember the exact commands, and it’s less suited for complex, multi-step operations.
App control, conversely, is the champion of precision and planning. When you need to set a sous-vide bath to an exact temperature like 145.5°F (63.0°C), a visual interface with a slider or number pad is far superior to hoping a voice assistant understands the decimal. Apps are ideal for pre-planned, complex operations, like setting up a multi-stage cooking program for a roast. The visual feedback provides confirmation and reduces the mental burden, as you can see all the settings at a glance.
| Control Type | Best For | Precision Level | Cognitive Load |
|---|---|---|---|
| Voice Control | Simple, immediate tasks with messy hands | Good for round numbers (400°F) | Higher – requires memory |
| App Control | Complex, pre-planned operations | Excellent (63.5°C exact) | Lower – visual confirmation |
| Hybrid Approach | Combining both based on task needs | Optimal flexibility | Balanced |
Use voice for the broad strokes and app control for the fine details. This allows you to leverage technology to make your cooking process more fluid, efficient, and precise, freeing up your mental energy to focus on creativity.
Why Do Soy Sauce and Butter Work Together According to Molecular Pairing?
Some flavor combinations are so profoundly delicious they feel like magic. Soy sauce and browned butter is one of them. Drizzled on pasta, steak, or even popcorn, it creates a depth of flavor that is far more than the sum of its parts. This isn’t magic; it’s a perfect example of molecular pairing and the “kokumi” effect, a core concept in the modernist understanding of flavor.
While umami is known as the fifth taste (savory, meaty), kokumi is a more recently understood sensation from Japan that translates roughly to “rich taste” or “mouthfulness.” It’s not a taste on its own, but a flavor enhancer that makes other tastes seem fuller, richer, and longer-lasting. This is precisely what happens when soy sauce meets butter. Soy sauce is rich in glutamates (a source of umami). When you brown butter (creating a beurre noisette), you initiate the Maillard reaction, which creates hundreds of new aromatic compounds and, crucially, releases specific peptides.
According to a core principle detailed in many culinary guides, including the MasterClass on molecular gastronomy, these peptides from the browned butter interact with the glutamates from the soy sauce on your tongue. This synergy triggers the calcium receptors in your mouth, signaling a sensation of richness, complexity, and a satisfying, lingering finish. You’re not just tasting salt (from the soy) and fat (from the butter); you’re experiencing a scientifically-backed amplification of flavor. This principle explains why parmesan and anchovies are so good in Caesar dressing, or why mushrooms and beef are a classic pairing. Understanding this allows you to create your own “kokumi bombs” by intentionally pairing ingredients rich in glutamates with those that produce these special peptides through cooking.
This is “ingredient intelligence” in its purest form: knowing not just what tastes good, but *why* it tastes good, and using that knowledge to build more delicious food from the molecules up.
Key Takeaways
- Texture is a primary ingredient: Understanding gelling agents like agar and gelatin is more important than owning a siphon.
- Perception is half the flavor: Strategic plating can transform a simple dish into an experience using tools you already own.
- Modernism is efficient: Techniques like full-ingredient utilization challenge the myth of fine-dining waste and create more flavor.
How to Design a 7-Course Tasting Menu at Home Without Hiring a Staff?
Designing and executing a multi-course tasting menu at home seems like the ultimate culinary challenge, an endeavor reserved for professional kitchens with a brigade of chefs. The secret, however, isn’t a bigger team; it’s a smarter strategy. The key to success is twofold: a meticulous timeline and the clever cross-utilization of components. This turns a frantic ordeal into a manageable, even enjoyable, performance.
First, abandon the idea of cooking everything on the day of the dinner. Adopt the “Prep-Day vs. Play-Day” strategy. The day before your event is your “Prep-Day.” This is when you do all the heavy lifting: make your gels, powders, infused oils, purées, and sauces. If you’re using a low-temperature technique like sous-vide, this is when the cooking happens. By the end of Prep-Day, 80% of your menu should be complete and stored in your fridge, ready for assembly. “Play-Day”—the day of the party—is for final, high-impact tasks only: reheating sauces, searing proteins, and, most importantly, the artistic final plating. This frees you from the stove and allows you to enjoy the evening with your guests.
Second, design your menu for efficiency through component cross-utilization. A great tasting menu tells a story, and recurring elements can be a part of that narrative. A beautiful Parmesan broth made on Prep-Day can be the base for a light soup in course one, reduced down into a more intense sauce for a pasta in course three, and used as the cooking liquid for a risotto in course five. A single lemon-thyme gel can garnish a fish dish and also provide a bright accent to a dessert. This approach not only saves an immense amount of time but also creates a cohesive and professional-feeling menu where flavors echo and evolve throughout the meal.
| Base Component | Course #1 Use | Course #3 Use | Course #5 Use |
|---|---|---|---|
| Parmesan Broth | Light soup base | Sauce reduction | Risotto cooking liquid |
| Lemon-Thyme Gel | Fish garnish dots | Salad dressing base | Dessert accent |
| Herb Oil | Bread dipping | Vegetable drizzle | Plate decoration |
By combining strategic planning with smart component design, a stunning 7-course menu becomes not a stressful nightmare, but the ultimate expression of your new modernist culinary skills.